Waxing
Upper Lip Waxing Guide: Prep, Technique, Aftercare, Bumps

Quick answer
For an upper lip wax, let the hair grow to about a quarter of an inch and stop shaving or tweezing beforehand. Hard wax is the usual choice for this area. Tell your practitioner about retinoids before the service. Waxing does not make upper lip hair grow back thicker, darker, or faster. Hair that is becoming coarser is worth mentioning to a physician.
Upper lip waxing is one of the shortest services on any waxing menu and one of the least forgiving. The area is small, it sits in the middle of the face, and the skin there is thinner and more reactive than almost anywhere else a practitioner works. A leg wax that goes slightly wrong hides under jeans. A lip wax that goes wrong shows up at work the next morning as a red band, a row of small bumps, or a shiny patch where the top layer of skin came away with the wax. I have been a licensed electrologist and cosmetologist for more than twenty years, and the upper lip is still the area where I ask the most questions before I pick up a spatula.
This guide is written for two readers. If you are a client, it explains what an upper lip wax involves, how to prepare, which skincare products and medications make waxing a bad idea, what normal skin looks like afterward, and what to do about bumps or breakouts. If you are a waxing or esthetics student, it covers the same service from the practitioner's side: wax choice, working the lip in two halves, supporting the skin, and staying off the lip itself. Everything here is general education, not medical advice. Questions about a medication, a skin condition, or sudden hair growth belong with a physician or dermatologist.
What an Upper Lip Wax Actually Covers
On most menus, an upper lip wax, often shortened to lip wax, means the strip of skin between the base of the nose and the top edge of the lip, from one corner of the mouth to the other. It does not include the lip itself, the inside of the nostrils, or the chin. Some studios stop at the corners, and some include the small patch of hair that sits just below and outside each corner. That patch is where shadows tend to show in photographs, so it is worth one direct question when you book: does this service include the corners of the mouth, or is that part of a separate chin or lower face service?
The hair in this area is usually a mix of two types. Vellus hair is the fine, soft, nearly colorless fuzz that covers most of the face. Terminal hair is thicker, darker, and rooted more deeply. Many clients have mostly vellus hair along the center of the lip and a few darker terminal hairs toward the corners. Wax removes both, which is why the skin looks so clean and makeup sits so smoothly afterward. It also explains why the corners often sting more than the center: the darker hairs there are anchored more firmly, so their removal is felt more sharply.
Waxing pulls each hair out of the follicle, root included, so the result lasts longer than shaving or depilatory cream, which only remove hair at or just below the surface. It is still a temporary method. The follicle is left intact and will produce a new hair in time. Clients sometimes arrive expecting waxing to reduce hair permanently after enough visits, and I correct that at the first appointment. Waxing manages hair. If the goal is to stop a specific hair from ever returning, that is a different service, and I come back to it near the end of this guide.
Who Should Not Wax the Upper Lip Right Now
Most problems I have seen after an upper lip wax trace back to something that should have been caught before the service, not to the wax itself. The skin above the lip is exactly where people apply their strongest skincare. Anti-aging creams, acne treatments, and brightening serums all get spread across this area, and many of them thin or loosen the outer layer of the skin. Wax grips that outer layer as well as the hair. When the surface is already fragile, the wax can take a thin sheet of skin with it. Practitioners call this skin lifting, and it is the main reason a proper consultation matters even for a five-minute service.
Retinoids are the first thing I ask about. That includes prescription tretinoin, adapalene, and tazarotene, and it also includes over-the-counter retinol and retinaldehyde products, which clients often forget to mention because they bought them at a drugstore. Topical retinoids speed up cell turnover and leave the surface more delicate. The common professional guidance is to stop them on the area for several days before waxing, and many practitioners ask for about a week. Product strength and skin type vary, so some skin needs longer. If you are unsure whether a product contains a retinoid, bring it or photograph the ingredient list and let your practitioner read it.
Oral isotretinoin, prescribed for severe acne, is a firm stop. It changes how the skin behaves throughout the body, and waxing during a course, or too soon after one, carries a real risk of tearing and scarring. The guidance most practitioners and wax manufacturers follow is to wait at least six months after the last dose, and the prescriber has the final say on when your skin is ready. A professional who learns you are taking isotretinoin should decline the service politely. If a studio is willing to wax your face while you are on it, treat that as a reason to leave.
Exfoliants deserve the same attention. Glycolic, lactic, and salicylic acid products, benzoyl peroxide, enzyme masks, scrubs, and at-home peel pads all weaken the surface for a period after use. So do professional treatments such as chemical peels, microdermabrasion, dermaplaning, and laser or light procedures. Each has its own waiting time, and the right gap depends on the strength of the treatment. I ask clients to list everything that has touched the lower face recently, including products used by habit. The full list of medications, conditions, and treatments that rule out a service is in my guide to waxing contraindications and when not to wax.
Cold sores are the other question I never skip. If you have a history of cold sores around the mouth, the irritation and heat of waxing can be enough to set off a new outbreak in some people. An active sore, or the tingling that comes just before one, means no waxing that day, both for your skin and because the virus spreads by contact. If you get cold sores regularly and want to wax, speak with your physician first. A doctor can advise whether preventive medication makes sense for you. That decision is a medical one and is not something a waxing professional can make on your behalf.
A few more situations call for rescheduling. Sunburned or windburned skin should heal completely first. Active acne, open cuts, rashes, eczema or dermatitis flares, and any unexplained lesion on the area are reasons to wait or to see a dermatologist. Recent cosmetic injections near the mouth should be cleared with the provider who performed them. Clients who use blood thinners, have diabetes, or have a condition that slows healing should ask their physician before any facial waxing. None of this is meant to scare anyone away. It simply means the conversation comes before the wax, every time.

How to Prepare for an Upper Lip Wax
Hair length is the first thing to get right. Wax needs something to hold. The usual guideline is about a quarter of an inch, roughly the length of a grain of rice. On the upper lip, where hair is fine, slightly shorter growth can sometimes be removed with a good hard wax, but freshly shaved or trimmed stubble will not come out cleanly. If you have been shaving or using a facial razor, let the hair grow until you can pinch it between two fingertips. If you have been tweezing strays between visits, stop, because tweezing puts hairs on different growth schedules and leaves the result patchy.
In the days before the appointment, simplify what goes on the lower face. Pause retinoids and exfoliating acids on the area for the period your practitioner recommends. Skip scrubs and peel pads. Keep the skin moisturized as usual so it is supple, since dry, flaky skin is more likely to lift. Avoid sunbathing and tanning beds, because wax on sun-stressed skin is a common route to dark marks later. Gentle cleansing and a plain moisturizer are all the area needs.
On the day itself, arrive with a clean face if you can, or expect the practitioner to remove makeup from the area. Heavy foundation, sunscreen residue, and lip balm that has migrated above the lip line all interfere with how wax grips. Try not to schedule the wax immediately before an important event. Most redness settles fast, but skin does not follow a timetable, and a first appointment tells you how yours behaves. Clients preparing for a wedding or a photo session should do a trial wax well ahead so there are no surprises.
- Let the hair grow to about a quarter of an inch, and stop shaving or tweezing the area beforehand.
- Pause retinoids and exfoliating acids on the lower face for the period your practitioner advises.
- Skip scrubs, peels, and facial treatments on the area in the days before.
- Stay out of strong sun and tanning beds, and reschedule if the skin is burned.
- Mention any history of cold sores, and cancel if one is active or starting.
- Arrive with clean skin, without heavy makeup or balm above the lip.
- List every medication and skincare product, including over-the-counter ones.
- Book a trial well before any event where your face will be photographed.
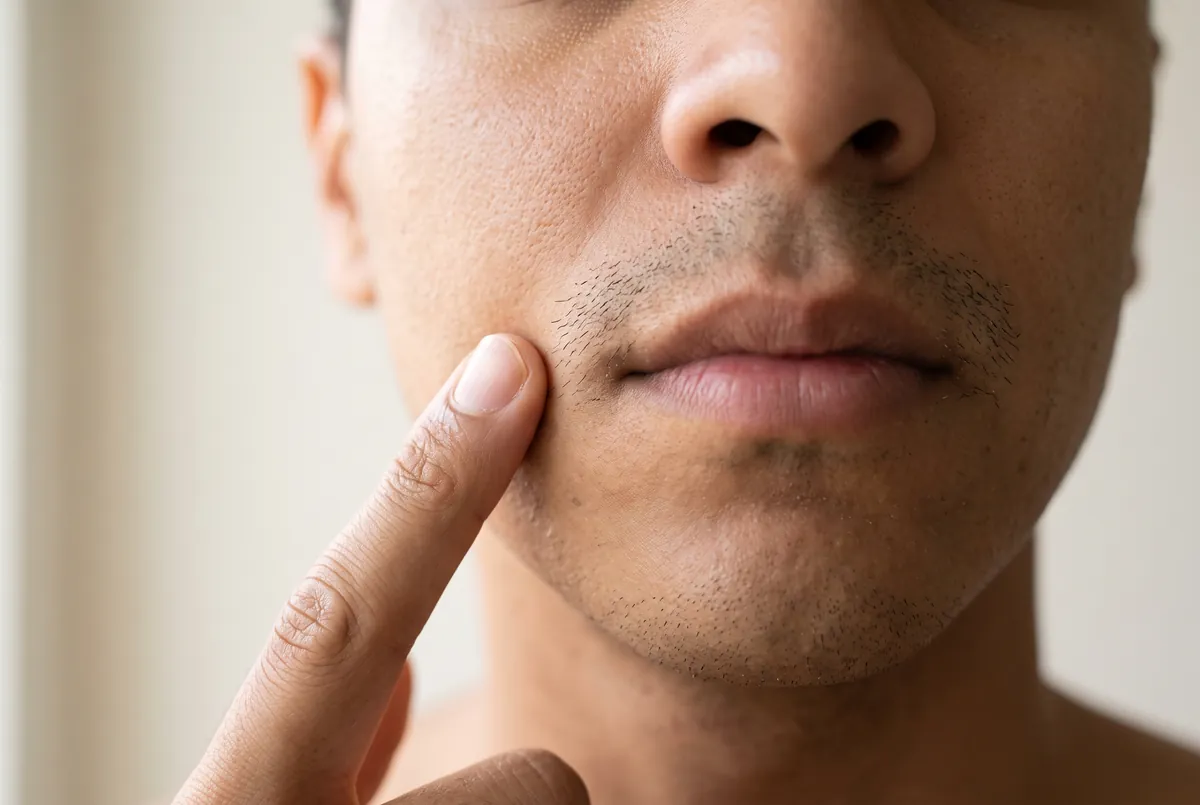
Hard Wax vs Soft Wax for the Upper Lip
Both types of wax can remove upper lip hair, and you will find skilled practitioners who prefer each. Soft wax, also called strip wax, is spread in a very thin layer and removed with a cloth or paper strip. It grips fine vellus hair extremely well, which is its strength on the lip. Its weakness is that it also adheres firmly to the skin surface, so it is less forgiving on delicate or prepped skin and should not be applied twice over the same spot. Hard wax is applied thicker, allowed to set, and removed on its own without a strip. As it sets it tightens around the hair and holds the skin less aggressively.
For most faces, I reach for hard wax on the upper lip. The skin there is thin, it sits over a mobile muscle, and many clients use active skincare whether they admit it or not. A good hard wax formulated for the face, applied at a comfortable temperature, gives a small margin of safety that soft wax does not. A light layer of pre-wax oil underneath adds a little more, because the oil keeps the wax from bonding directly to the skin while still letting it grip the hair. That said, hard wax applied too thin becomes brittle and breaks during removal, which creates its own problems.
| Factor | Hard wax on the lip | Soft (strip) wax on the lip |
|---|---|---|
| How it is removed | Sets and is lifted off by its own edge | Removed with a cloth or paper strip |
| Grip on the skin surface | Lower, especially over pre-wax oil | Higher, adheres to the top layer of skin |
| Grip on very fine hair | Good when applied at the right thickness | Very strong |
| Going over an area again | Sometimes possible with care on sturdy skin | Should be avoided |
| Common beginner error | Applying too thin so it cracks | Applying too thick or waxing the same spot twice |
| Best suited to | Sensitive, thin, or reactive facial skin | Resilient skin with dense fine fuzz |
Temperature matters more on the lip than on the body. Facial skin registers heat quickly, and wax that feels fine on a forearm can be too warm under the nose. A careful practitioner tests each new dip on the inside of the wrist and watches the consistency in the pot: it should move like thick honey, never runny. Sugar paste is a third option some studios use on the face, and it has its own technique. A full comparison of formulas, including when each one makes sense, is in my guide to the types of wax for hair removal.
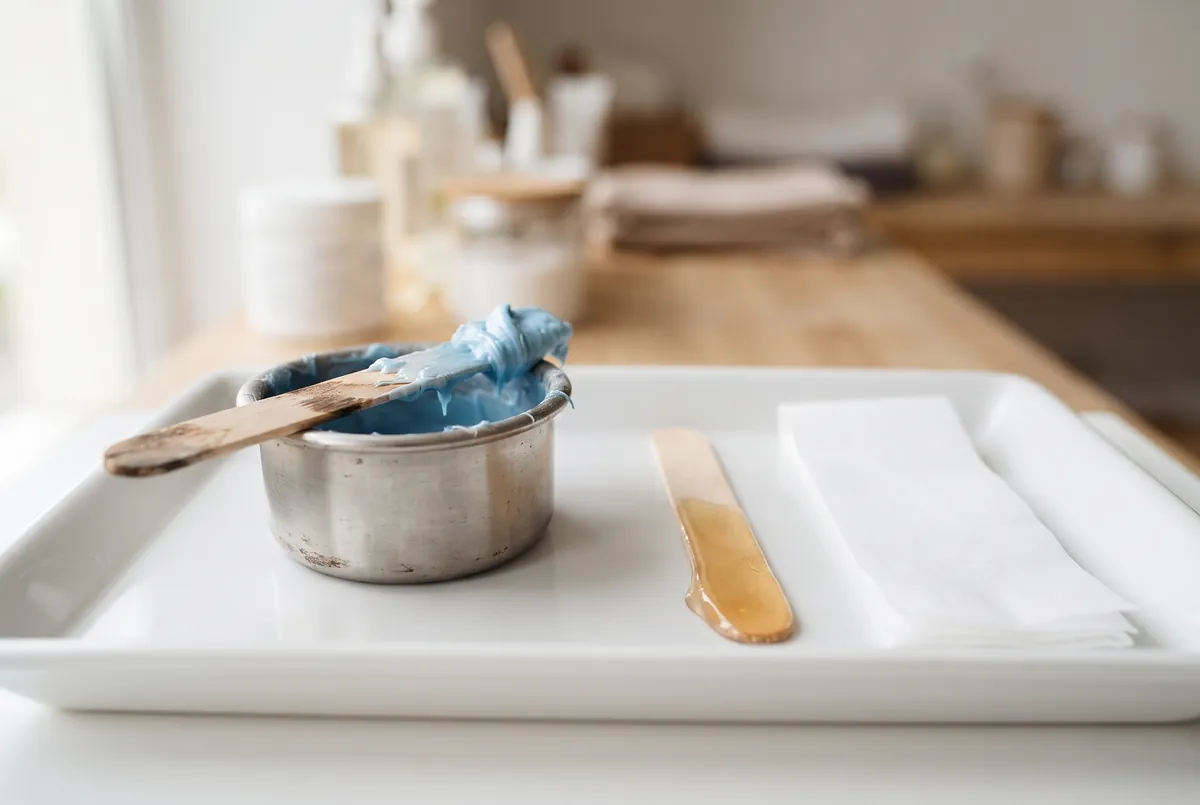
Upper Lip Waxing Technique, Step by Step
The service starts with cleansing. The practitioner removes makeup, oil, and sunscreen from the area with a gentle pre-wax cleanser and dries the skin completely, because moisture stops wax from gripping. With hard wax, a very small amount of pre-wax oil goes on next. With soft wax, many practitioners use a light dusting of powder instead to absorb moisture and put a barrier between wax and skin. The client lies back with the head supported, and the practitioner works from behind the head or from the side, with good light falling directly on the mouth.
The single most useful habit for students is to treat the upper lip as two halves, never as one strip. The hair on each side generally grows downward and outward, away from the center line below the nose and toward the corner of the mouth. One piece of wax laid across the whole lip would lie with the growth on one side and across it on the other. It would also bridge the dip in the middle, where the skin curves and wax pools. Working each side separately gives a flat, readable section, a clear direction, and far better control over where the edges of the wax land.
For each half, wax goes on in the direction of growth, from just beside the center line out toward the corner. With hard wax, the practitioner builds a slightly thicker rounded edge at the outer end. That edge is the lip of the wax, the part that gets flicked up and gripped for removal. The layer should be even, about the thickness of a coin, with clean borders. With soft wax, the layer is sheer enough to see skin through it, and the strip is pressed on firmly and rubbed in the direction of growth, leaving a free end to hold.
The lower edge of the wax is where precision counts most. The vermilion border is the line where the pinkish red of the lip meets ordinary facial skin. Lip tissue has no hair, a very thin surface, and no tolerance for wax. Wax should stop just short of that border, close enough to catch the hairs that grow right along it, and never cross onto the lip. Students tend to err in one of two directions: they stay so far above the border that a visible line of fuzz is left behind, or they drift onto the lip and cause a sore, peeling patch. A smaller applicator and a steady resting hand solve both.
Skin support during removal separates a comfortable lip wax from a painful one. The upper lip is loose skin over muscle with nothing rigid directly beneath it. If the wax is pulled without support, the skin travels with it, which hurts more and can bruise or lift. Before removal, the practitioner anchors the skin with the free hand right at the end where the pull begins, holding it taut. The client helps by keeping the lip stretched over the teeth. Then the wax comes off in one quick motion against the direction of growth, from the corner back toward the center, staying low and parallel to the skin.
Pulling upward, away from the face, is the most common technical fault I correct in the practice room. It snaps hairs at the surface instead of removing them from the follicle, leaves stubble behind, and tugs the skin away from the tissue below. The pull should skim along the face. Immediately after, the practitioner presses a fingertip or the side of the hand firmly on the freshly waxed skin for a few seconds. That pressure calms the nerve endings and takes much of the sting out. Then the second half is done the same way, as a mirror image.
The corners of the mouth need their own approach. The skin there folds, creases when the client moves, and often carries the darkest hairs. Wax that settles into the crease will pinch when removed. I ask the client to stretch the mouth slightly, sometimes by pushing the tongue into the cheek beside the corner, so the fold opens flat. A very small patch of wax goes on, following the growth, which at the corners often angles down toward the chin. Support is placed especially close, and the pull is short. Trying to catch the corner as part of the main section rarely works.
Once both halves and the corners are done, the practitioner checks the area in good light, ideally from more than one angle. A few stray hairs along the border or under the nostrils are normal, and they are removed with tweezers, not with a second layer of wax. Going back over freshly waxed lip skin is how most lifting happens, particularly with soft wax. Any wax residue is dissolved with a little post-wax oil, and a soothing, fragrance-free product is applied. A professional also follows basic hygiene throughout: gloves, a fresh applicator for every dip into the pot, and clean linens for each client.
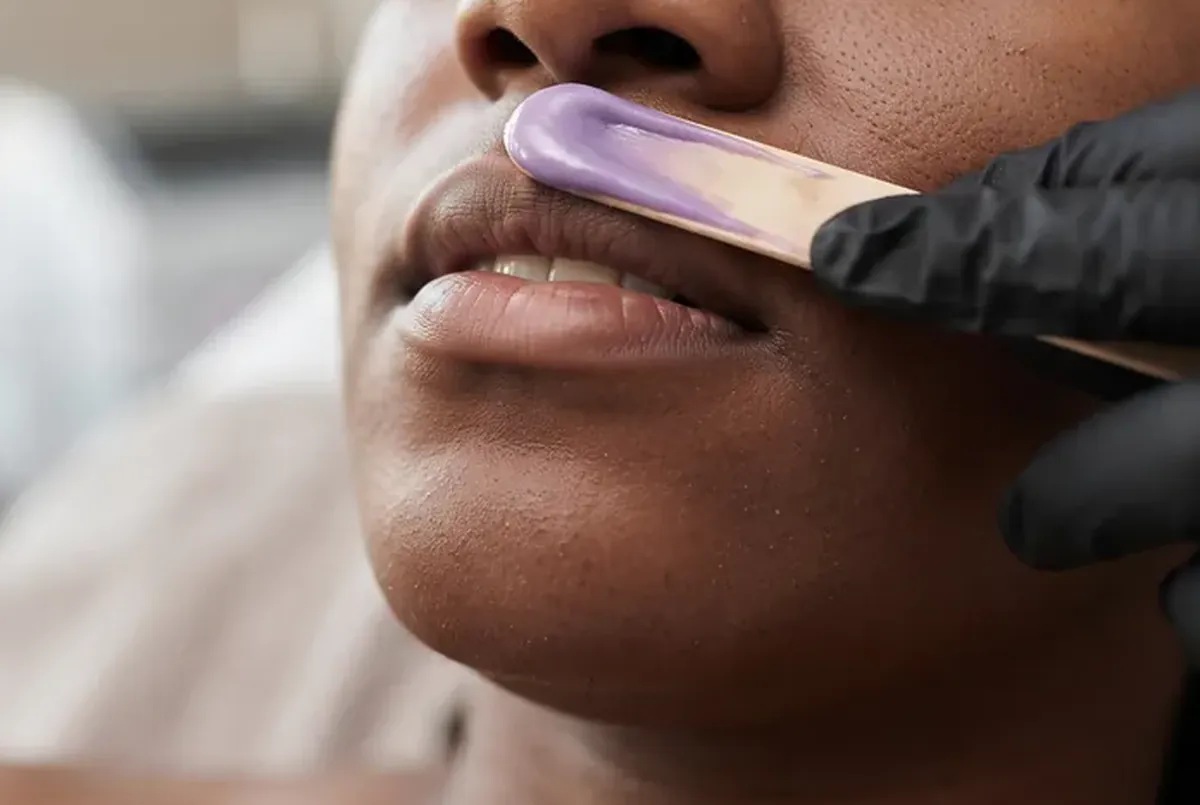
Does Upper Lip Waxing Hurt?
It stings, and it is over quickly. The area just below the nose is rich in nerve endings, so many clients feel a sharp flash and find that their eyes water or that they need to sneeze. That reflex is normal and says nothing about pain tolerance. The whole service is usually two to four pulls. Most clients tell me the first appointment is the most uncomfortable and that later visits are easier, partly because they know what to expect and partly because regrowth on a regular schedule is often softer than hair that has been shaved for years.
Technique accounts for much of the difference between a wax that makes you wince and one you barely register. Firm skin support, a fast low pull, and immediate pressure afterward all reduce the sensation. On the client's side, a few small choices help: breathe out as the wax is removed, avoid caffeine right before the appointment if it makes you jumpy, and do not book when your skin is already irritated. Numbing creams are something to discuss with a pharmacist or physician before use, since they are medications and can change how skin responds to heat. More ways to make the service easier are in my guide on whether waxing hurts and how to reduce discomfort.
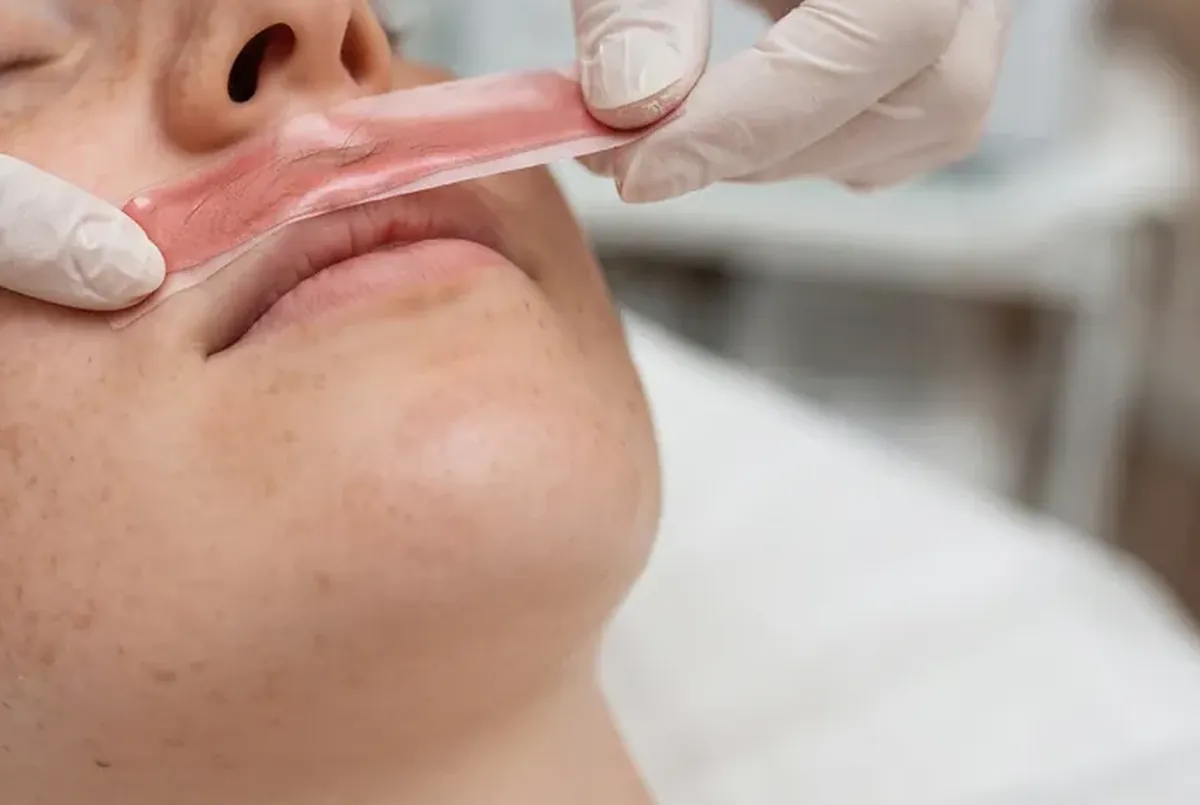
Upper Lip Wax Aftercare: The First Two Days
Right after an upper lip wax, expect some pinkness and a warm, slightly tight feeling. On fair or reactive skin, the area can stay flushed for a few hours, and sometimes small raised dots appear at the follicles. This is the skin's ordinary response to having hairs pulled out, and for most people it fades within the day. Every follicle that just released a hair is briefly open and more exposed than usual. Aftercare is about protecting those openings from heat, friction, bacteria, and harsh ingredients until the skin has settled, which generally means the first 24 to 48 hours.
Hands are the biggest issue with this particular area. People touch their mouth and nose constantly without noticing, and every touch carries oil and bacteria to freshly waxed skin. Keep fingers away, and when you wash your face, use clean hands, lukewarm water, and a mild cleanser, then pat dry. Makeup is the second issue. Foundation and concealer pressed into open follicles are a frequent cause of bumps after an upper lip wax, so leave the area bare for the rest of the day if you can. If you must cover redness, wait several hours and use clean tools.
- Keep your hands off the area, and resist checking it with your fingertips.
- Skip makeup on the lip area for the rest of the day when possible.
- Avoid hot showers aimed at the face, saunas, steam rooms, and hot yoga for a day or two.
- Hold off on hard workouts that leave sweat sitting on the face.
- Stay out of direct sun and tanning beds, and use a broad-spectrum sunscreen once the skin has calmed.
- Do not use retinoids, acids, scrubs, or peel pads on the area until the skin feels normal again.
- Choose plain, fragrance-free products, and avoid perfumed creams and essential oils.
- Use a cool, clean compress if the skin feels hot or looks puffy.
For soothing, simple is best. A plain aloe gel without added fragrance or alcohol, or the post-wax product your practitioner recommends, is enough for most skin. Heavy ointments and thick balms can trap heat and block follicles, so use them sparingly on this area unless a professional advises otherwise. Do not apply a new product for the first time on freshly waxed skin, because that is the worst moment to discover a sensitivity. After a few days, gentle exfoliation helps new hairs reach the surface. My waxing aftercare guide goes through each day in more detail.
Bumps and Breakouts After an Upper Lip Wax
Small bumps after an upper lip wax worry clients more than anything else, so it helps to know the different kinds. The first is immediate: tiny pink or skin-colored dots at each follicle that show up within minutes and fade over hours. That is a normal inflammatory response and needs only time and cool, clean skin. The second kind appears a day or two later as small whiteheads. These are usually irritated or mildly infected follicles, most often caused by touching, makeup, sweat, or heavy products during the window when the follicles were open. They are common after a first wax and tend to happen less as the skin adapts.
If whiteheads appear, do not squeeze them. Picking on the upper lip is the fastest way to turn a three-day annoyance into a mark that lasts for weeks. Keep the area clean, keep products minimal, and let them resolve. If you break out after every single wax despite careful aftercare, that is information worth acting on. Sometimes the culprit is a particular wax or a post-wax product, sometimes it is fragrance, and sometimes the skin simply does not tolerate waxing in that area. A practitioner can change the formula or the routine, and a dermatologist can help if the pattern continues.
A third kind of bump arrives later, as hair grows back. An ingrown hair forms when a new hair curls or gets trapped under the surface and causes a firm, sometimes tender bump. They are less frequent on the upper lip than on the bikini line or neck, but they do occur, particularly at the corners where hairs are coarser and when hairs were snapped during removal. Gentle exfoliation after the first few days and correct technique both reduce them. Prevention and treatment are covered in my guide to ingrown hairs after waxing.
Some reactions need more than patience. A cluster of small fluid-filled blisters that tingles or burns, especially in someone with a history of cold sores, should be seen by a physician. So should spreading redness, increasing pain, pus, warmth that gets worse instead of better, or bumps that have not improved after several days. Hives, significant swelling, or itching that starts soon after the service can point to an allergic reaction to an ingredient in the wax or an aftercare product, and that also deserves medical advice before you wax again.
Skin Lifting and Dark Marks After Lip Waxing
Skin lifting looks different from ordinary redness. Instead of an even pink flush, there is a distinct patch, often with a sharp edge, that looks shiny, raw, or wet, and it stings when touched or when product is applied. Over the next days it may form a thin scab or a darker, dry area. It happens when the wax removes part of the outer layer of skin along with the hair. The usual causes are retinoids or acids used beforehand, sun-stressed or very dry skin, wax that was too hot, soft wax applied twice over the same spot, or poor skin support during the pull.
If your skin has lifted, treat it as a superficial wound. Keep it clean, handle it gently, and do not pick at any scab. Leave makeup, acids, retinoids, and scrubs off the area until it has fully healed, and protect it from the sun, because healing skin on the face darkens easily. If the area is large, very painful, weeping, or showing signs of infection, see a physician. It is also fair to tell the studio what happened. A responsible practitioner will want to know, will review what was on your skin beforehand, and will change the approach or advise against waxing that area.
Pigmentation is the longer-lasting concern on the upper lip. Any inflammation in this area can leave a darker mark as it heals, known as post-inflammatory hyperpigmentation, and sun exposure makes it more likely and more stubborn. Clients with medium to deep skin tones are generally more prone to it, and so are clients who already have melasma on the upper lip, the brownish shadow sometimes mistaken for hair. Waxing does not cause melasma, but irritation and sun together can make existing pigment more noticeable. Daily sunscreen on the upper lip is the most practical protection there is.
The practical rule I give clients is to keep sun and waxing apart. Do not wax skin that is tanned or burned from the past few days, and do not head to the beach or the ski slope the afternoon after a lip wax. If a dark band appears above the lip and does not fade, a dermatologist can tell you whether it is pigment from irritation, melasma, or something else, and can suggest treatment. A waxing professional should not try to bleach or peel it away, and should pause facial waxing on that area until the cause is clear.

Waxing Your Upper Lip at Home
Waxing the upper lip at home is possible, and many people do it without trouble. It is also the area where I see the most home accidents, for understandable reasons. You are working on your own face in a mirror, which reverses your movements. You have one hand to hold the skin and one to pull, at an awkward angle. And there is no second person to look at your skin beforehand and say that today is not the day. The contraindications earlier in this guide apply at home exactly as they do in a studio, and a home kit comes with nobody to enforce them.
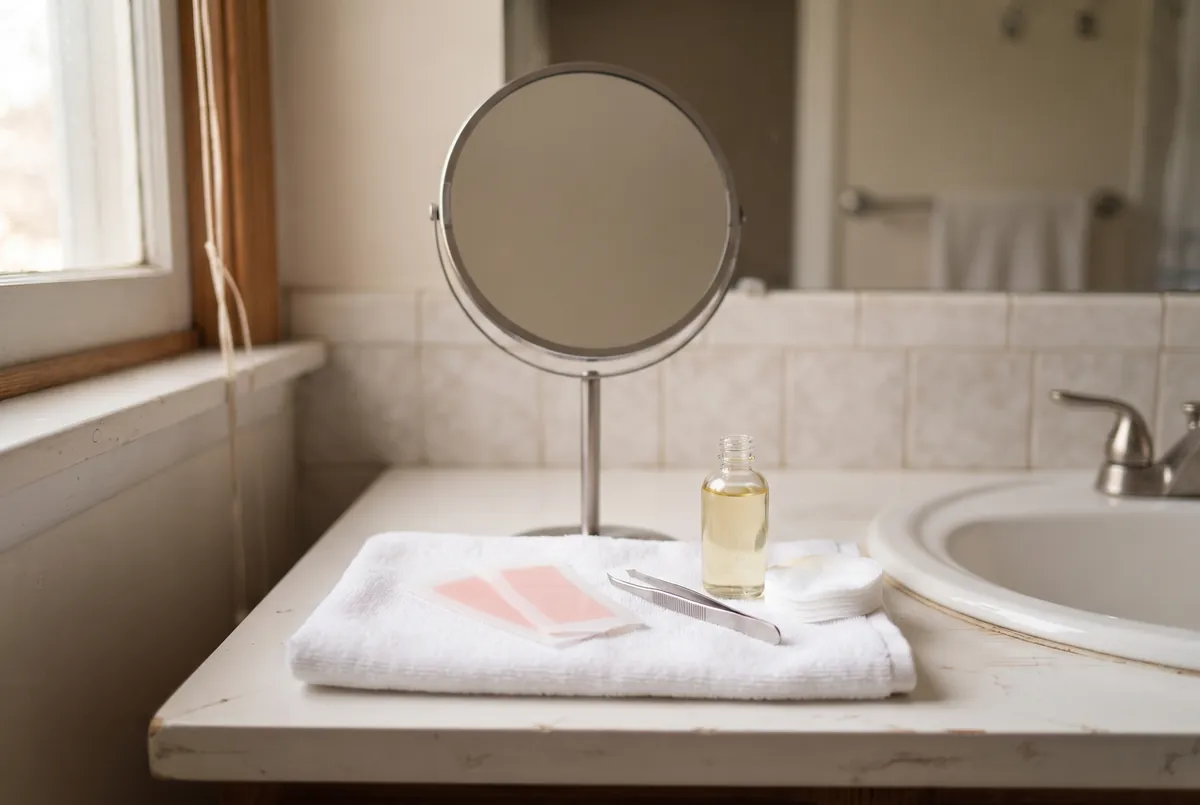
If you decide to do it yourself, choose a product made specifically for the face. Pre-made cold wax strips sized for the lip are the simplest starting point, because there is no heating and therefore no burn risk. If you use a heated hard wax, follow the manufacturer's instructions precisely, heat it only as directed, and test the temperature on the inside of your wrist before every application. Microwaved wax can be far hotter in the middle than at the surface, so stir it thoroughly. Do a patch test with any new product a day or two before, on a small area along the jaw.
The technique is the same one a professional uses, scaled down. Cleanse and dry the skin. Work one half at a time. Apply in the direction of growth, from near the center out toward the corner, and stop short of the lip line. Tuck your upper lip over your teeth, hold the skin taut near the corner with your free hand, and remove the wax in one quick movement back toward the center, keeping the pull flat along the skin. Press on the area with a clean finger afterward. If hairs remain, tweeze them. Do not apply wax to the same spot a second time.
There are clear signs that home waxing is not the right choice. If you use retinoids or exfoliating acids regularly, have a history of cold sores, tend to develop dark marks, or have lifted skin before, see a professional or pick a different method. The same goes for anyone who hesitates on the pull: a slow, partial removal hurts more and bruises. And if the hair is coarse and dark, more like beard hair than fuzz, home waxing tends to be painful and unsatisfying, and a conversation with a physician and an electrologist is a better use of your time.
Does Waxing Make Upper Lip Hair Grow Back Thicker?
No. Waxing does not make upper lip hair grow back thicker, darker, or faster. The thickness and color of a hair are set by the follicle and by the hormones acting on it, not by what happens to the hair shaft at the surface. This belief mostly comes from shaving. A razor cuts each hair straight across at its widest point, so the regrowth has a blunt tip that feels coarse and looks darker against the skin. A hair that regrows after waxing is a new hair with a naturally tapered tip, which is why regrowth after waxing usually feels softer than stubble.
There are honest reasons a client may feel that hair came back worse. After shaving or cream, the first regrowth contains every hair at once, so it can look dense. A first wax removes hairs that are at different stages of their cycle, and hairs that were resting under the skin emerge over the following weeks, which can look like fast regrowth when it is simply different hairs. Finally, upper lip hair often does change over the years because of hormones, age, or medication. If someone began waxing around the same time, the wax gets the blame for a change that would have happened anyway.
Some clients who wax regularly for a long time tell me their regrowth seems finer or sparser. I have seen that too, but it is not guaranteed, and I never promise it. As for how long an upper lip wax lasts, it varies widely with the individual's growth cycle, hormones, and hair type. Many clients rebook every few weeks, once the regrowth is long enough to remove. The useful rule is to wait until the hair meets the length guideline instead of waxing by the calendar, and to avoid shaving in between, which resets the texture and timing.
When Upper Lip Hair Points to a Physician, or to Electrolysis
Fine hair on the upper lip is normal for women, and how visible it is depends heavily on family background and coloring. Some patterns, though, deserve a medical conversation and not just a standing wax appointment. I suggest seeing a physician if coarse, dark hair on the lip or chin appeared or increased noticeably over a short period, if it comes with irregular periods, persistent acne, scalp hair thinning, or unexplained weight change, or if it started after a new medication. Excess terminal hair in a male pattern is called hirsutism, and it can be associated with hormonal conditions such as polycystic ovary syndrome. Only a physician can evaluate that.
A waxing professional's role here is limited and still valuable. We see the same faces every few weeks, so we are often the first to notice a change. We cannot diagnose anything, and we should not guess out loud at a condition. What we can do is say plainly that the hair pattern has changed and that it is worth mentioning to a doctor. Waxing can continue in the meantime if the skin tolerates it. Treating the cause, where there is one, and removing the hair are two separate tasks, and many clients need both.
For clients who are tired of the cycle, the permanent option is electrolysis. It treats each follicle individually with a fine probe, and it is the only method the FDA accepts for permanent hair removal claims. It works on every hair color, including blonde, gray, and red, and on every skin tone, which matters on the lip where many hairs are too light for laser. It takes a series of sessions, and hairs need to be visible above the skin, so clients are asked to stop waxing and tweezing before they begin. I explain the process, sensation, and aftercare in my guide to electrolysis for the upper lip.
Learning Upper Lip Waxing as a Student
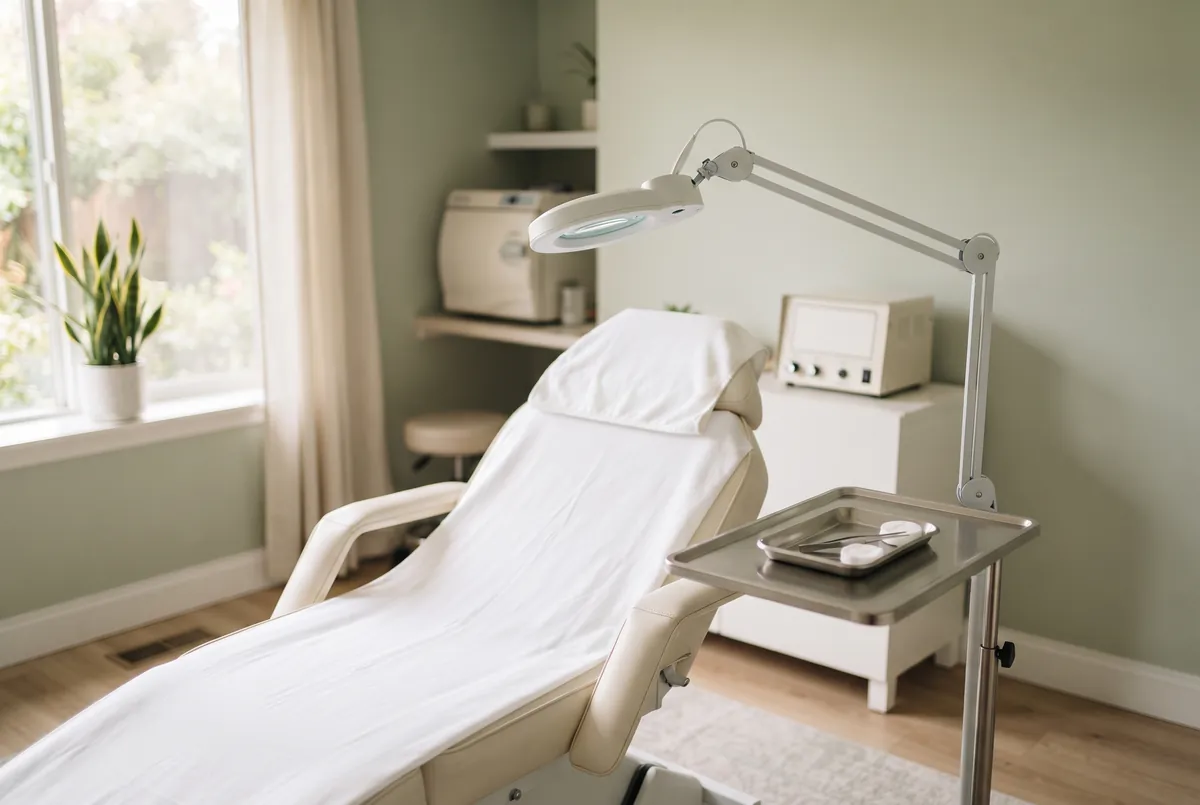
Students often underestimate the lip because it is quick. In my experience it is one of the best tests of fundamentals, since every weakness shows: an incomplete consultation, wax that is too hot or too thin, a loose supporting hand, an upward pull, an edge that strays onto the lip. Practice the motions on your own forearm before working on a face. Learn to read growth direction with a magnifying lamp. Rehearse the consultation questions about retinoids, isotretinoin, acids, sun, and cold sores until you ask them without thinking, and get comfortable saying no to a service when the answers call for it.
It also helps to understand the legal side early. In the United States, performing waxing on the public requires a license, and each state decides which license covers it, how many training hours are required, and what the exam involves. Some states have a dedicated waxing license, and in others waxing falls under esthetics or cosmetology. Requirements differ enough that I do not quote numbers here. Check your own state in the waxing licensing guide or the esthetics licensing guide, and confirm the details with your state board before enrolling anywhere.
Online study has a real place in this training. Theory such as skin anatomy, hair growth cycles, contraindications, sanitation, and wax chemistry can be learned well from structured lessons, and students who arrive at practical sessions already knowing it progress faster. Online theory does not replace the in-person hours a state requires, and it does not replace a license. Hands-on technique has to be learned on real skin under supervision. Our waxing course is built to cover the theory side thoroughly so that your supervised practice time goes toward the skills that only practice can build.
Your Next Step
If you are a client, the next step is simple: check your skincare for retinoids and acids, let the hair grow to a length you can pinch, and book with a licensed professional who asks about your skin and medications before touching the wax. Pay attention to how your skin behaves over the two days after the first appointment, and tell your practitioner what you noticed. If the hair is coarse, has changed recently, or you are simply done with repeat visits, raise it with your physician and read about electrolysis. If you are a student, start with the licensing rules for your state, then build your theory so every supervised hour counts.
State Requirements
State licensing guides
Hours, exams, fees, and the licensing board differ by state. Open your state for the current requirements.
Common Questions
FAQ
The usual guideline is about a quarter of an inch, roughly the length of a grain of rice. On the upper lip, where hair is fine, a good hard wax can sometimes remove slightly shorter growth, but freshly shaved stubble will not come out cleanly. A practical test is whether you can pinch the hair between two fingertips. Stop shaving and tweezing the area beforehand so the hairs reach a workable length together.
It varies from person to person, because hair growth cycles, hormones, and hair type all differ. Many clients return every few weeks, once regrowth is long enough for the wax to grip. After a first wax, some hairs that were resting below the skin may surface sooner, which can make regrowth seem quick. Results tend to look more even once you have been waxing on a regular schedule and are not shaving in between.
No. Hair thickness and color are determined by the follicle and by hormones, not by how the hair is removed. The idea comes mostly from shaving, which leaves a blunt tip that feels coarse. Hair that regrows after waxing has a tapered tip and usually feels softer. If your upper lip hair really is becoming coarser or darker over time, the cause is more likely hormonal, and it is worth mentioning to a physician.
Follicles stay open and more exposed for a day or two after waxing. Touching the area, applying makeup, sweating, and heavy or fragranced products can irritate them and cause small whiteheads. Keep your hands off, leave the skin bare for the rest of the day, and use plain, fragrance-free products. If breakouts follow every wax despite careful care, ask your practitioner about a different wax and see a dermatologist if it continues.
Not while you are actively using it on that area. Retinoids make the skin surface more delicate, and wax can remove a layer of skin along with the hair. The common guidance is to stop topical retinoids on the area for several days to about a week before waxing, and longer for some skin. Oral isotretinoin requires a much longer wait after the last dose, with your prescriber's approval.
Never wax over an active cold sore or when you feel the tingling that comes before one. Even between outbreaks, the irritation of waxing can trigger a new sore in some people. If you have a history of cold sores and want to wax your upper lip, speak with your physician first about whether prevention is appropriate for you, and always tell your practitioner about that history before the service.
Both can work. Many practitioners, myself included, prefer hard wax for the upper lip because it grips the hair more than the skin and is gentler on thin facial skin. Soft strip wax removes very fine fuzz efficiently but adheres more to the skin surface and should never be applied twice over the same spot. Skin condition and technique matter more than the formula.
Electrolysis. It treats each follicle individually and is the only method the FDA accepts for permanent hair removal claims. It works on all hair colors and skin tones, which is useful on the lip, where many hairs are too fine or too light for laser. It requires a series of sessions, and you need to stop waxing and tweezing so the hairs are visible. My electrolysis guide for the upper lip, linked above, explains the process.
Keep Reading
Related Guides


