Electrolysis
Electrolysis Insertion Technique for Beginners: Angle and Depth
Quick answer
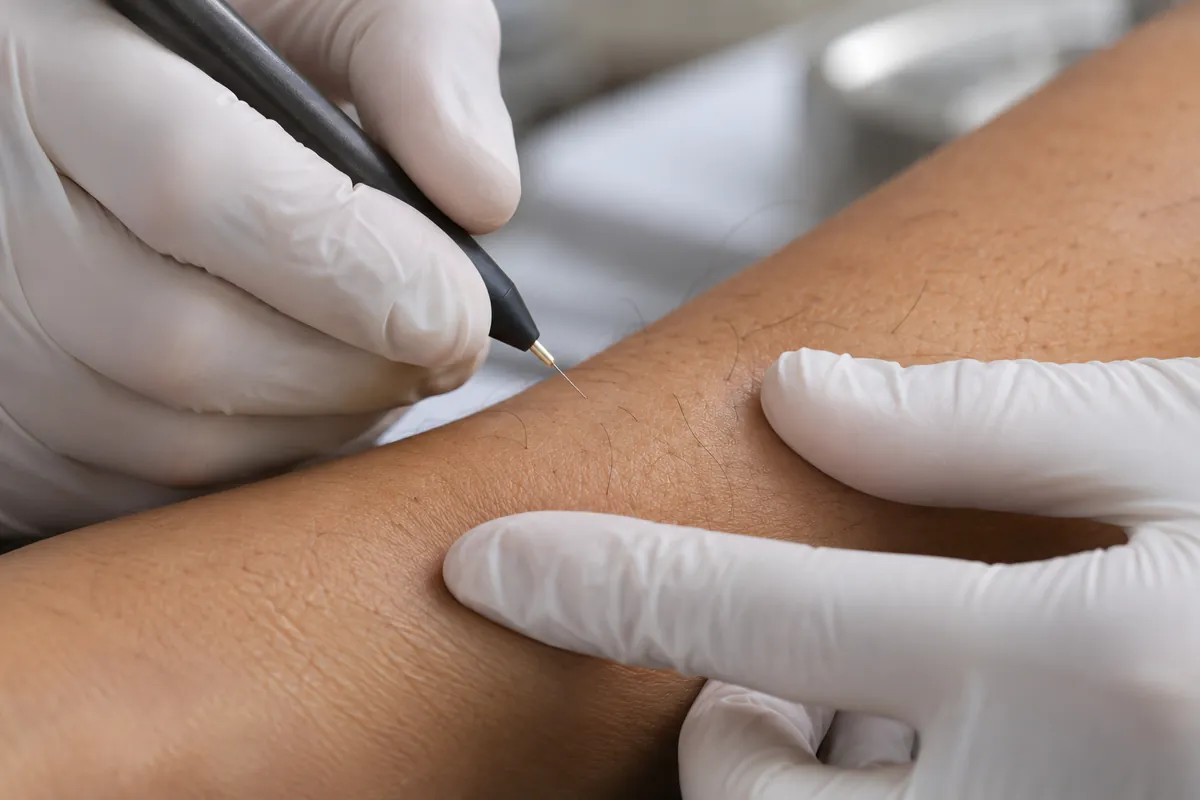
Electrolysis insertion technique means sliding a fine probe into the natural follicle opening along the direction of the hair, to the depth of the lower follicle, without piercing or moving the skin. Students learn to read each hair's angle, feel a soft stop at the base, stretch the skin, hold the probe lightly with the hand braced, and work under magnification. It is learned on real skin under an instructor's supervision.
Every electrolysis treatment comes down to one small movement repeated thousands of times: sliding a fine probe into a hair follicle so accurately that the client barely feels it, the skin does not move, and the current reaches the place where the hair grows. Students call it the insertion, and it is the skill that separates an electrologist from someone who merely owns an epilator. Machines, modalities, and settings matter, but none of them can rescue a probe that went in at the wrong angle or stopped at the wrong depth.
This guide explains how electrolysis insertion technique is taught to beginners: follicle direction, angle, depth, skin stretching, hand position, magnification, the way schools sequence practice, and the errors nearly every student makes at first. It is an educational overview for people considering the profession and for students who want the theory clear in their minds. It is not a substitute for training. Insertion is a hands-on skill that must be learned on real skin under the supervision of a qualified instructor in a licensed or state-approved program, and nobody should attempt it on another person from a written description.
What an insertion is and why it decides everything
A hair follicle is a tiny natural channel in the skin with an opening at the surface. The hair sits inside it. In electrolysis, the probe enters that existing opening and travels down alongside the hair, between the hair and the follicle wall, until its tip reaches the lower part of the follicle where the growth cells are. Nothing is pierced. A correct insertion does not puncture skin, which is why a well-trained electrologist can insert without the client feeling a prick at all.
Once the probe is in place, current is applied for a set time, the probe is withdrawn, and the hair is lifted out with tweezers. If the insertion was accurate and the current sufficient, the hair slides out without any pull. If the probe missed, by leaning into the follicle wall, stopping short, or going past the base, the energy is delivered to the wrong tissue. The hair may regrow, and the surrounding skin takes heat or chemical action it did not need. That is why instructors spend so long on insertions before they let students think about speed.
It helps to understand how the current destroys the follicle, because the two skills are learned together. Our guide to galvanic, thermolysis, and blend explains the three modalities. For this article, hold on to one idea: the probe is the delivery tool, and the current acts around it. Where the probe sits is where the treatment happens. Accurate placement lets a practitioner use conservative settings and still get a clean release.
The follicle a student has to picture
You cannot see below the skin surface, so insertion is done by mental picture and by feel. Students begin by learning the structure they are aiming for. The follicle is a sleeve of tissue that slopes down into the skin. Near the top it is joined by an oil gland. At the bottom the hair widens into the bulb, which sits over the papilla, the structure that supplies the growing hair. Partway up the follicle is a region called the bulge, which is also involved in regrowth. Effective treatment needs to affect the growth tissue in the lower follicle.
Follicles differ by body area and by person. Fine facial hair on the upper lip grows from shallow follicles. Coarse hairs on the chin, the underarm, or the bikini line grow from deeper ones. Follicles in the same patch of skin can sit at different depths depending on the stage of growth: a hair in its active growing phase is anchored deeper than one that has stopped growing and is waiting to shed. This is one reason theory matters at the table, and our guide on hair growth phases and electrolysis covers the cycle in detail.
Follicles are not always straight either. Tightly curled hair grows from curved follicles. Years of tweezing or waxing can leave follicles distorted, so the channel bends partway down. A beginner tends to imagine a neat straight tube, like the textbook diagram, and is surprised when a probe meets resistance halfway. Instructors teach students to expect variation, to feel for it, and never to force the probe past it.

Direction and angle: reading the hair
The hair itself is the guide. A hair leaves the skin in the same direction that its follicle lies beneath the surface, so the first thing a student learns is to look at each hair before touching it: which way does it point, and how steeply does it rise from the skin? The probe is then lined up as a continuation of the hair, as if the hair were an arrow showing the path back down. The probe enters at the follicle opening, on the underside of the hair, the side where the hair forms the smaller angle with the skin.
Angle varies widely across the body, and that is something no chart can replace. On some areas hairs lie almost flat against the skin, and the probe must travel at a very shallow angle. On others they stand more upright. Within a small area such as the chin, neighboring hairs may point in different directions, and growth patterns swirl at the neck and along the jaw. Students learn to reposition their hand, or the client, for each group of hairs instead of holding one comfortable angle and hoping it fits.
One classic beginner error is judging direction from the tip of a long hair, which may bend or curl away from the true line of the follicle. Instructors teach students to look at the first short section of hair as it emerges. Many practitioners prefer clients to arrive with a few days of growth, long enough to grasp with tweezers and short enough to show its true direction. Lifting the hair slightly with the tweezers to see how it leaves the skin is another technique students practice early.
When the angle is right, the probe slides in with almost no sensation of effort. The skin around the opening stays still. When the angle is off, the probe tip presses into the follicle wall and the skin moves with it: you see a small dimple or a slight tenting where the probe is pushing against tissue. That visible movement is the student's most important early feedback. The response is always the same: stop, withdraw, look at the hair again, and realign.
Depth: how far the probe travels
Depth is the second half of accuracy and the harder one to learn, because it is judged largely by touch. The aim is for the probe tip to reach the lower portion of the follicle without pressing through its base. Stop too shallow, and the current acts near the surface instead of on the growth tissue, which risks both regrowth and surface skin reactions. Go too deep, and the probe pushes past the bottom of the follicle into tissue that should not be treated.
Students are taught two main sources of information about depth. The first is tactile. As the probe reaches the bottom of the follicle, there is a faint sense of resistance, a soft stop. Learning to notice it takes time, because the probe is extremely fine and the signal is subtle. A relaxed grip is essential, since a tense hand cannot feel anything. If the student keeps pushing after the stop, the skin surface will dimple downward around the probe, a visual sign that the insertion has gone too far.
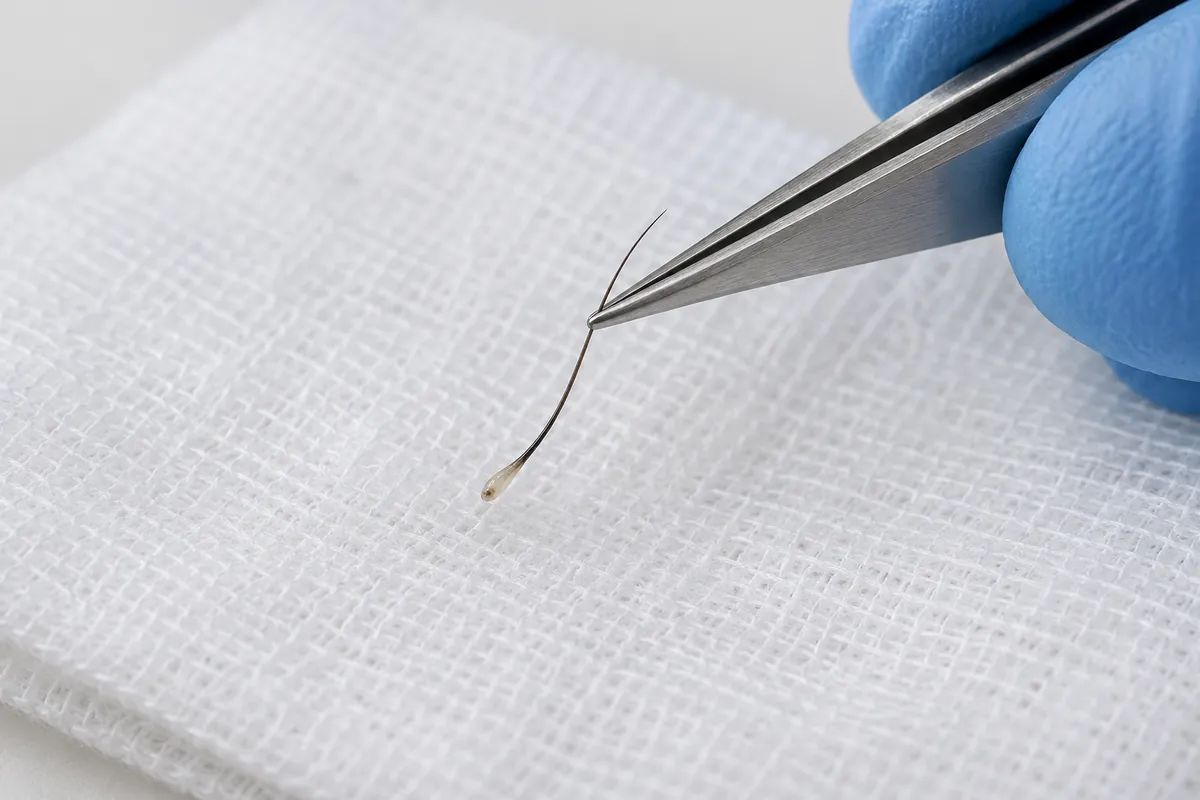
The second source is the hair that has just been removed. A properly epilated growing hair comes out whole, with its root end intact, and the length of the portion that was below the skin shows how deep that follicle was. Students learn to glance at the epilated hair and compare it with how far the probe went in, then use that as a guide for neighboring hairs of the same type. It is a continuous cycle of insert, treat, remove, observe, and adjust.
Depth is never one number for an area. Two hairs side by side can differ because one is actively growing and the other is at a resting stage, sitting higher in the follicle. That is why instructors discourage beginners from "setting" a depth in their minds and repeating it mechanically. Each insertion is its own small act of attention. This sounds exhausting, and at first it is. With practice the judgments become automatic, the way a driver stops thinking about each turn of the wheel.
Skin stretching and the supporting hand
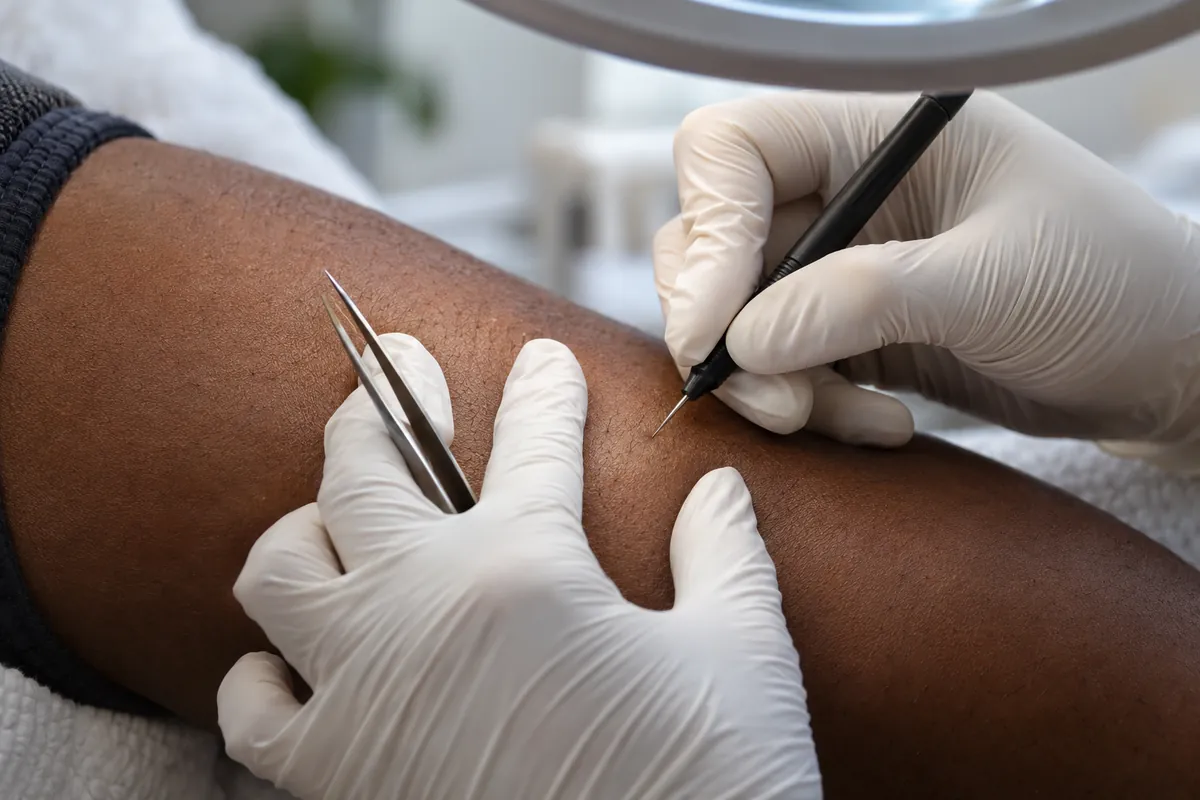
Insertion is a two-handed skill. While the dominant hand guides the probe, the other hand prepares the skin. Gently stretching the skin around the hair opens the follicle mouth, steadies the surface so it does not shift under the probe, and makes the hair's direction easier to read. On loose or soft areas, such as under the chin, the underarm, or the bikini line, insertions without a good stretch are far more difficult, and beginners often blame their probe hand for a problem that actually belongs to the supporting hand.
Schools teach stretching as a deliberate technique. Commonly the fingers of the supporting hand are placed on either side of the working area and drawn apart, and a finger of the probe hand may provide a third point of tension. The stretch should be firm enough to flatten the skin and light enough not to distort the follicle's angle or hurt the client. Pulling too hard changes the direction the follicle lies in, so the hair appears to point one way while the channel beneath runs another.
The supporting hand has other jobs. In many techniques it holds the tweezers, ready to lift the treated hair the moment the current stops, which keeps the rhythm smooth. It also keeps contact with the client, and that steady, calm touch is reassuring in a way beginners underestimate. Practitioners differ in how they divide tasks between their hands, and a good school shows more than one method so each student can find an arrangement that suits their hands and the area being treated.
Hand position, grip, and positioning
The probe holder is usually held somewhat like a pen, lightly, between the thumb and first fingers. Lightly is the word instructors repeat most. New students grip hard because they are nervous, and a hard grip does three bad things: it blocks the faint tactile signals of the follicle, it transmits every tremor to the probe tip, and it tires the hand within minutes. A relaxed hold lets the probe almost find its own way down the channel once the angle is right.
Stability comes from bracing, not from squeezing. The side of the hand or the ring and little fingers rest on the client's skin near the work area, creating a fixed base so that only the fingertips move. This is how people with a slight natural tremor still perform excellent insertions. The movement itself is tiny: a short, smooth slide in, complete stillness while the current flows, and a smooth slide out along the same line. Students practice keeping the probe motionless during current, since movement at that moment spreads the effect to tissue it was not meant for.
Wrist and forearm alignment matter over a career. A wrist bent sharply to reach an awkward hair will ache by the end of the day and will be less precise from the first minute. Instead of bending the wrist, students are taught to change the setup: turn the client's head, raise the table, move the stool, or shift their own position around the table. The rule I give students is that the hand should approach every hair from its most comfortable position, and everything else in the room moves to make that possible.
Good insertions start before the probe is picked up. The client is positioned so the treatment area is flat, well lit, and supported, and so the hairs point in a direction the practitioner can follow comfortably. For the upper lip this may mean working from behind the client's head. For the chin and neck the head is turned or tilted. For the underarm the arm is raised and supported. Students learn standard positions for each area and then learn to adjust them for the individual in front of them.
Your own position matters equally. Sit with both feet supported, back upright, shoulders down, and elbows close to the body. The work should be at a height where your forearms are roughly level and your neck is only slightly inclined toward the magnification. If you find yourself hunching, the table is too low or the lamp is too far. Beginners often tolerate a bad position because they do not want to interrupt the session. Experienced electrologists interrupt constantly, in small ways, because they know that comfort and accuracy are the same thing.
Client comfort feeds directly into insertion quality. A person who is cold, tense, or bracing for pain moves, and a moving target cannot be treated precisely. Students are taught to explain what they are about to do, to check in during the session, and to give the client something simple to do, such as resting their hands and breathing slowly. A relaxed client has relaxed skin, and relaxed skin is noticeably easier to work on, especially on the face.
Magnification and light
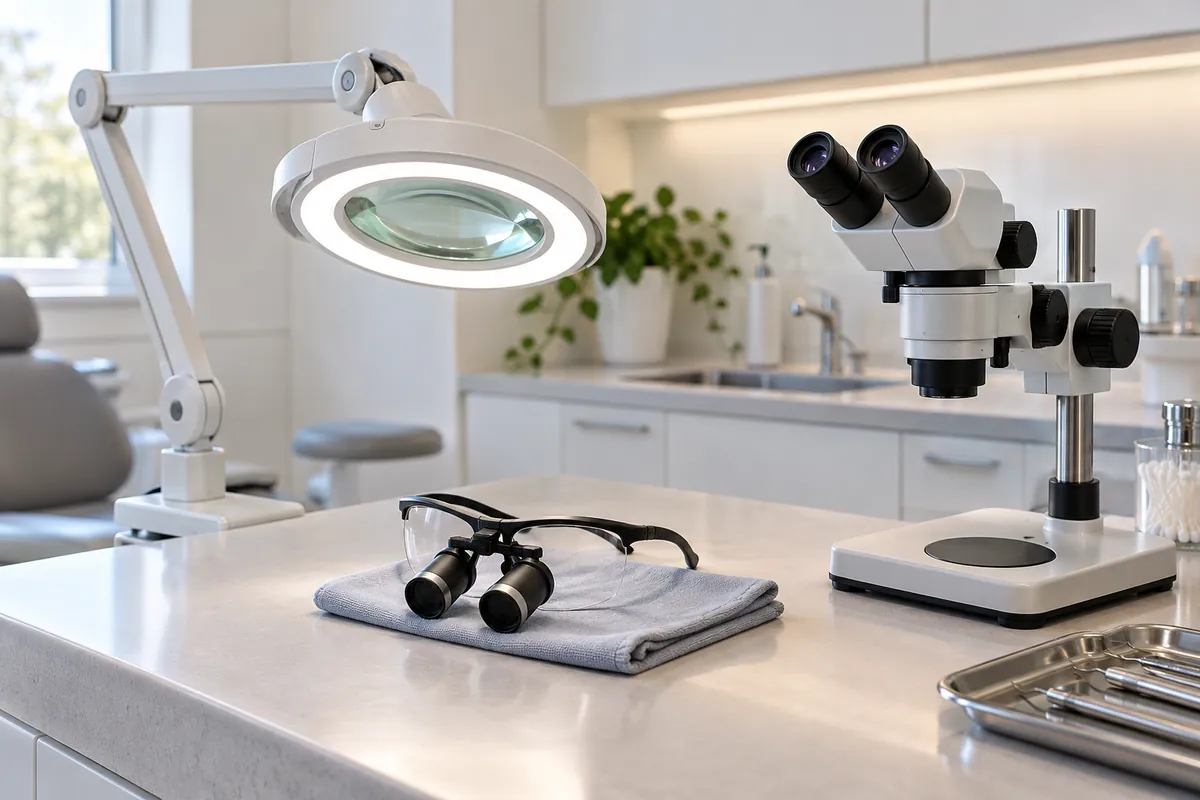
You cannot insert into what you cannot see. The follicle opening is tiny, fine hairs are nearly invisible to the naked eye, and the skin's reaction during treatment has to be watched continuously. Electrologists work with magnification, and students usually meet three kinds. The magnifying lamp is a lens with built-in light on an adjustable arm, simple to use and common in schools. Loupes are worn like glasses and move with the head. Stereo microscopes give higher magnification and a three-dimensional view, with the practitioner sitting upright at the eyepieces.
Each option changes posture and working distance. A lamp sits between you and the client and must be positioned for every new area. Loupes fix your working distance, which encourages a consistent posture once they are fitted correctly. A microscope keeps your head and back upright and shows fine detail, and it takes some time to learn coordination under it. No single choice is right for everyone. A school that lets students try more than one type is doing them a favor, and it is a fair question to raise when you are choosing an electrolysis school.
Light is the partner of magnification. It should be bright, even, cool, and directed so that hairs cast a faint shadow, which makes fine and light-colored hairs easier to pick out. Glare off freshly cleansed skin can hide the follicle opening, so students learn to adjust the angle of the light as well as the lens. Vision correction matters too. Anyone training as an adult should have an eye examination and mention the working distance involved, since glasses made for that distance reduce eye strain considerably.
How probe choice affects the insertion
The probe, often called a needle although it is blunt-tipped and not meant to pierce, comes in a range of diameters and designs. For insertion technique the central principle is matching: the probe should be about as thick as the hair it is treating. A probe that is too thin for a coarse hair can flex, wander off line, and concentrate energy in a narrow zone. One that is too thick for a fine hair will not enter the follicle opening comfortably and stretches the tissue.
Students learn to change probes as the hair type changes during a session, instead of treating a fine upper lip hair and a coarse chin hair with the same one. They also learn that probe design, including shape, flexibility, and whether the shaft is insulated, changes how an insertion feels in the hand. Those topics deserve their own article, and we have one: the electrolysis needles guide covers diameters, materials, and insulation in detail.
One point belongs here because it concerns safety at the moment of insertion. Probes are sterile and single-use. A new one is opened for each client, handled without touching the working end, seated correctly in the holder, and disposed of in a sharps container afterward. A bent or damaged probe is replaced immediately, since a bend makes accurate insertion impossible. These habits are drilled in school until they are automatic, and they are examined in states that hold a practical licensing exam.
How schools sequence insertion practice
Programs differ, but the progression follows a common logic: understand first, then practice the movement without consequences, then practice on skin with close supervision, then add difficulty. Theory comes first or alongside, so the student knows what the follicle looks like and what the current does. Many instructors then have students handle the probe holder and tweezers on inanimate practice surfaces simply to learn the grip, the bracing, and the coordination of two hands under magnification.
The next stage is live skin with the machine at rest or under the instructor's direct control. Students commonly begin on easy, forgiving areas such as the forearm or lower leg, where hairs are visible, the skin is firm, and the angle is consistent. Often the first subject is the student's own leg, and then classmates. Practicing on yourself has a particular value: you feel exactly what a good and a bad insertion are like from the receiving side, and that feedback teaches faster than any explanation.
Only when insertions are reliably smooth does the instructor introduce current, starting conservatively and showing the student how to watch the skin and test whether the hair releases. After that, the school moves students through progressively harder areas and hair types, and then to members of the public in the student clinic. The exact structure and the amount of supervised practice required depend on the state, which you can check on the electrolysis licensing hub.
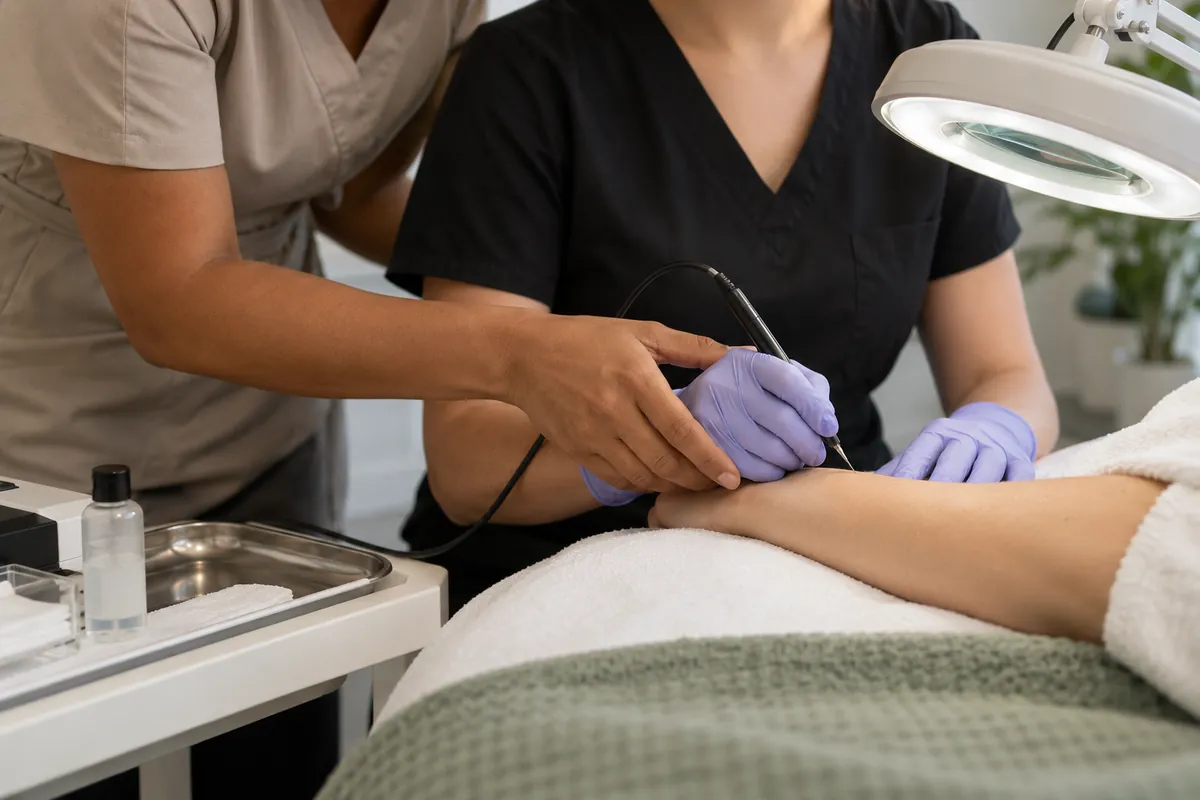
Throughout, the instructor's role is to see what the student cannot. A student feels that an insertion was fine. The instructor, looking through the same magnification, sees the skin dimple, the wrist cocked, the stretch released a moment too early. This outside eye is the reason insertion cannot be self-taught from videos or text. Bad habits formed alone feel normal to the person who has them and are very hard to remove later.
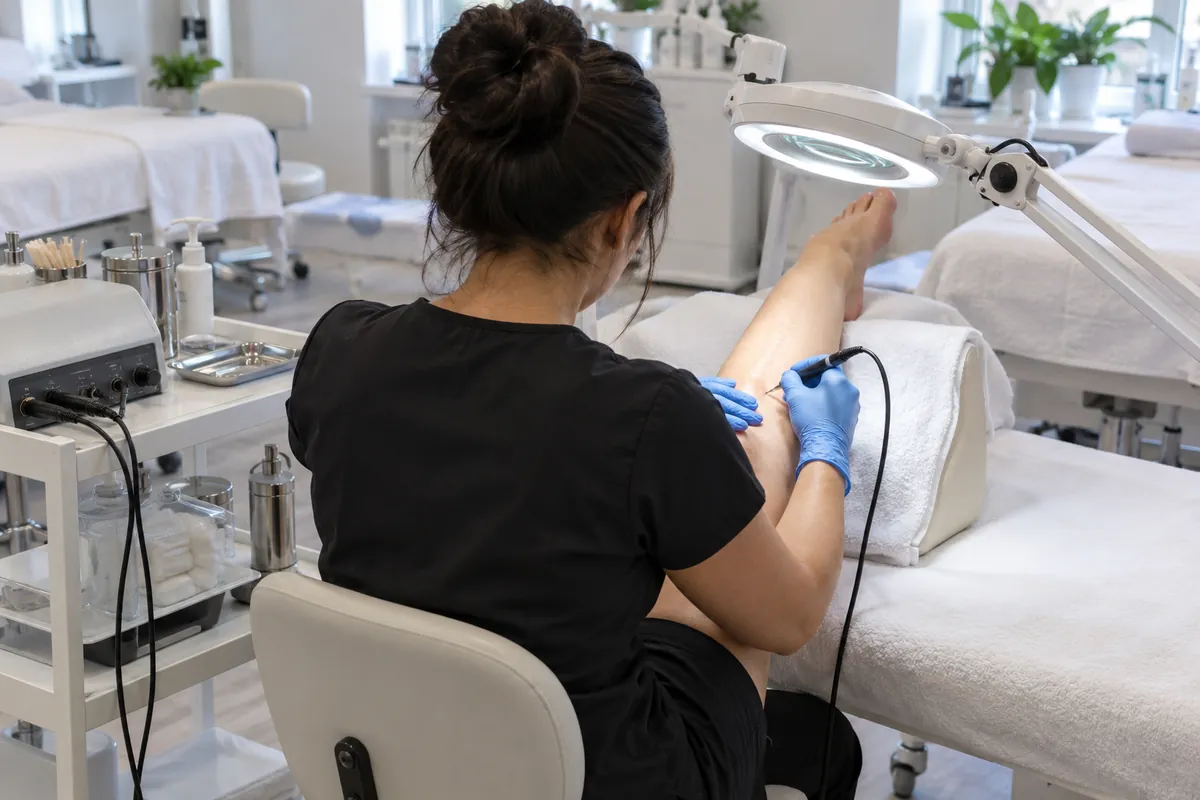
What a correct insertion looks and feels like
Students need clear signs of success to aim for. The first is on entry: the probe goes in without visible movement of the skin and without the client reporting a prick. The second is at depth: a soft stop, with no dimpling of the surface. The third comes during the current: the client feels a brief sensation of warmth or a quick sting, which varies with modality and area, and the skin around the follicle shows at most mild, expected changes. The fourth is the release: the hair slides out with no resistance at all.
That last sign is the one beginners are most tempted to cheat. If the hair resists and you pull anyway, you have tweezed it, and tweezing does not destroy the follicle. Instructors teach students to treat traction as information. A hair that will not release means the insertion was off, the current was insufficient, or both. The correct response is to reassess, not to tug. Counting how many hairs release cleanly is an honest measure of a student's progress.
The skin tells its own story afterward. Some redness and slight swelling around treated follicles is a normal, temporary response. Reactions that are stronger than expected can indicate insertions that were too shallow, current that was too high for that skin, or follicles treated too close together. Students learn to look at the area before the client leaves and, in school, to see the same clients again so they can observe healing. Our guide to electrolysis side effects and risks describes what is normal and what is not.
Common beginner errors
Nearly every student makes the same mistakes in roughly the same order, and knowing them in advance helps you recognize them sooner when your instructor points them out. None of them means you lack talent. They are the ordinary stages of learning a fine motor skill, and instructors expect to see every one of them. What matters is how quickly you notice an error yourself and correct it without being told.
- Wrong angle: lining the probe up with the hair tip instead of the base, so the probe presses into the follicle wall and the skin tents.
- Too deep: pushing past the soft stop until the surface dimples around the probe.
- Too shallow: stopping early out of caution, which places the current near the surface instead of at the growth tissue.
- Forcing through resistance: pushing when a curved or distorted follicle blocks the path, instead of withdrawing and realigning.
- Gripping too hard: a tense hold that hides tactile feedback, amplifies tremor, and tires the hand.
- No brace: working with the hand floating in the air instead of anchored on the client's skin.
- Weak or excessive stretch: letting the skin slide, or pulling so hard that the follicle's direction is distorted.
- Moving during current: shifting the probe or withdrawing before the current has stopped.
- Plucking: pulling a hair that has not released, which is tweezing with extra steps.
- Wrong probe size: using one probe for every hair instead of matching diameter to the hair.
- Poor positioning: bending the wrist and neck to reach a hair instead of moving the client, table, or stool.
- Rushing: chasing speed before accuracy is consistent.
The cure for almost all of these is the same: slow down, look at each hair, relax the hand, and ask for correction. Students who try to hide their difficulty from the instructor learn slowest. Those who say "I keep tenting the skin on these, can you watch my angle" get precise help and improve within the session. For more on the habits that carry over into your first job, see our advice for beginner electrologists.
Areas and follicles that challenge beginners
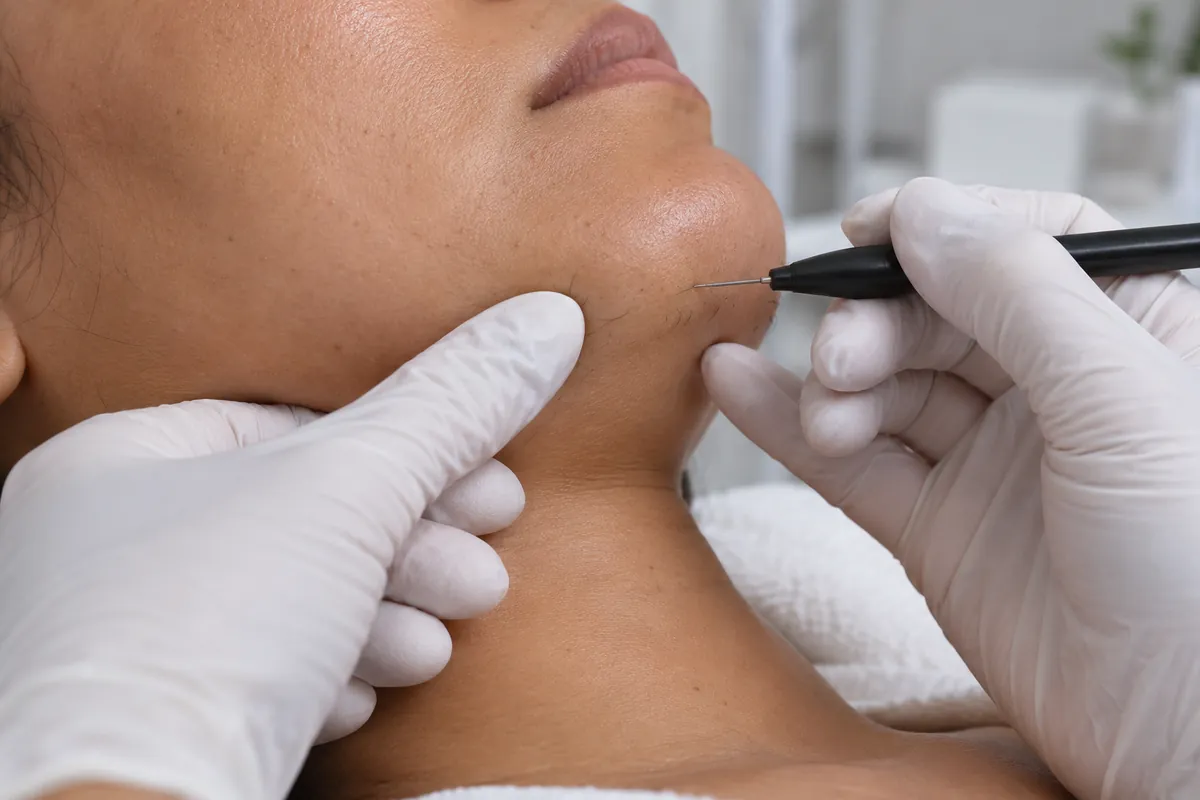
Some areas are harder than others, and schools introduce them gradually. The upper lip combines fine hairs, shallow follicles, sensitive skin, and a curved surface that moves when the client breathes or swallows. The chin and jawline have coarse, deep hairs with changing directions and loose skin beneath that needs a careful stretch. The neck has swirling growth patterns. The underarm and bikini area have deep follicles, hairs growing in several directions, and soft skin that is difficult to keep taut.
Certain follicles are challenging wherever they are. Curved follicles in tightly curled hair require the probe to follow a bend, which demands a light touch and a flexible approach to angle. Follicles distorted by years of plucking or waxing may resist a straight insertion. Ingrown hairs lie under the surface and must be handled as the instructor teaches for that specific situation. Fine, light hairs are simply hard to see. Treating a range of skin tones also requires attention to how each skin shows its response, and our guide on electrolysis for dark skin discusses that from the client's side.
The practical lesson for a student is to seek out these cases while still in school. It is tempting to stay with legs and forearms where everything goes smoothly. But after graduation you will meet the lip and chin on your first working day, because the face is where most clients want treatment. Ask your instructor to assign you difficult areas, and treat each one as borrowed expertise: you are learning with a safety net that will not be there later.
How skill builds, and what you can learn before clinic
Insertion skill develops in recognizable stages. At first every insertion requires conscious thought about angle, depth, stretch, and grip, and a session is mentally draining. Then individual parts become automatic. The stretch happens without thinking, then the bracing, then the rhythm of insert, treat, and lift. Eventually attention is free to move up a level, to reading the skin, adjusting settings, and talking with the client. How long each stage lasts varies between people and with the amount of supervised practice, so I will not attach a timeline.
Deliberate practice speeds the process. Work on one element per session: today, only the angle on steeply slanted hairs, tomorrow, only keeping the probe still during current. Keep a short log of what you practiced, on which area, and what the instructor corrected. Review it before the next session. Practice in shorter, focused periods when you can, since accuracy falls as the eyes and hands tire, and repeating sloppy insertions only trains sloppiness.
Look after the instrument, which is you. Hand and forearm stretches, regular breaks to look into the distance, good sleep before clinic days, and moderate caffeine all make a visible difference to steadiness. General fitness of the upper back and shoulders supports the posture the work requires. Students who treat insertion practice like an athlete treats training, with warm-up, focus, rest, and review, tend to graduate with technique that employers and clients notice.
Insertion itself must be learned in person, but a great deal of what makes it easier can be learned beforehand. If you understand follicle anatomy, you know what your probe is aiming for. If you understand the growth cycle, varying depths make sense. If you understand how each modality acts, you know why stillness during current matters. If you understand infection control, sterile handling of the probe is logical instead of a list of rules. Students who arrive at clinic with this picture in their minds spend their supervised hours on their hands.
That is the purpose of our online electrolysis theory course. It covers skin and hair structure, growth phases, electricity and modalities, probes, sanitation, and contraindications in a form you can study before or alongside your formal training. It does not teach you to perform insertions, and it cannot. It does not replace the in-person hours your state requires or the license itself. What it gives you is the understanding that makes an instructor's corrections land the first time.

Your next step
If this description of fine, patient handwork appeals to you, the next step is to find out what training your state requires and where you can get it. Start with the electrolysis licensing hub, then look at approved schools and ask each one how much supervised insertion practice students get and on which areas. Begin your theory now, so that the anatomy and terminology are already familiar when you sit down at the table for the first time.
And if you are already a student struggling with insertions, take heart. Everyone tents the skin, grips too hard, and plucks a few hairs at the beginning. Relax your hand, check your light, your posture, and your stretch, and ask your instructor to watch one specific thing at a time. The movement that feels impossible this month will be the one you do without thinking next year, and it will stay with you for the whole of your career.

State Requirements
State licensing guides
Hours, exams, fees, and the licensing board differ by state. Open your state for the current requirements.
Looking for a practitioner or a program near you? Browse electrologists by state and city or beauty schools by state.
Common Questions
FAQ
The insertion itself should be nearly painless, because the probe follows the natural follicle opening and does not pierce skin. A sharp prick on entry suggests the probe is not in the follicle. What clients do feel is the current, usually as brief warmth or a quick sting that varies by area, modality, and individual sensitivity. Skilled insertion allows conservative settings, which is one reason technique matters so much for comfort.
By touch, by observation, and by experience. There is a faint soft stop when the probe reaches the lower follicle, and the skin dimples if the probe is pushed too far. The removed hair also shows how deep its follicle was, which guides the next insertions on similar hairs. Depth varies with body area, hair type, and growth stage, so it is judged follicle by follicle and learned under supervision.
There is no single angle. The probe follows the direction of each individual hair as it emerges from the skin, and that direction changes from one body area to another and sometimes between neighboring hairs. Students learn to read the base of the hair, align the probe as an extension of it, and reposition the client or their own hand as growth direction changes. Visible tenting of the skin means the angle is off.
You can learn the theory behind it online, including follicle anatomy, growth phases, and how modalities work, and that preparation helps. The hand skill itself must be learned in person on real skin with an instructor watching and correcting you, in a program your state recognizes. Self-taught insertions build habits that feel normal and are wrong. An online theory course supports required training and never replaces it.
It varies with the person and with how much supervised practice the program provides. Most students feel clumsy for a while, then notice parts of the movement becoming automatic, and continue refining for years after licensing. I do not give a timeline because none would be accurate for everyone. Consistent practice, a relaxed hand, and regular correction from an instructor are what shorten the learning curve.
Skin movement means the probe is pressing on tissue instead of sliding within the follicle. Tenting on entry usually indicates the angle does not match the follicle's direction. Dimpling at the end of the insertion usually indicates the probe has reached the base and is being pushed further. In both cases the trained response is to stop, withdraw, look at the hair again, and realign, never to push through.
Reasonably steady hands help, but perfect stillness is not required. Technique provides stability: the probe hand is braced against the client's skin so only the fingertips move, and a light grip reduces tremor instead of amplifying it. Many people with a slight natural tremor become excellent electrologists. If you have a medical condition affecting your hands, ask your physician before you invest in training.
Resistance means the follicle was not adequately treated, because the insertion was inaccurate, the current was insufficient, or both. Pulling the hair anyway is simply tweezing and does not destroy the follicle. Students are taught to reassess the angle, depth, and settings, and to ask the instructor when hairs repeatedly resist. Probe size can be a factor too, as explained in the electrolysis needles guide.
Keep Reading
Related Guides


